Project Pteranodon (Part 2/2)
If you finished all the steps in the Part 1 post, you now have a “Tiny Pteranodon” body (green footy pajamas) with wings attached and a completed (but detached) head. So, all you have left to do is to attach the head, add a little tail and some finishing touches.
The Tail
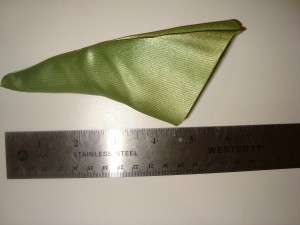
- Because I made a mistake with my original wings, and had to redo them, I had an easy way to make my tail — I just cut off one of the points from my first wings and used that. Hopefully, you only had to make 1 set of wings! But regardless you want to end up with a shape like this:
- On my “Tiny” tail, the longest side is 7″ long and the shorter side is 6″. The width of the base of the tail is 3-1/2″.
- To make it from scratch, you can just draw this curved cone shape onto the shiny fabric, right sides together, and — just like with the other pieces — pin and cut out leaving room for a seam allowance.
- Sew the pieces together along the drawn line, leaving the base of the tail open. Now it should look like my picture above.
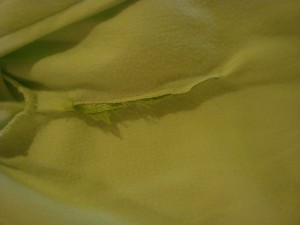
- Using a razor blade or seam ripper, cut a 3-1/4″ opening where the tail should go on the body — basically right on your child’s bottom.
- Stuff tail with just a little batting or other stuffing to keep it from sagging.
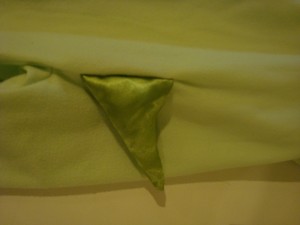
- With the point of the tail turned upward, slide the base of the tail through the slit in the pajamas. Turn some of the pajama fabric inward so there is a nice seam on the outside. Pin and machine-sew together. **I should have pulled a bit more fabric through when I made my tail because it is already pulling a tiny bit at the seam, but the inside seam will look something like this.**
- And this is the finished tail.
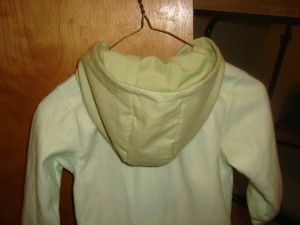
The Hood – This was my biggest challenge. I think the easiest way to securely keep the head in place would be to attach it to a hat with ear flaps that secures with velcro under the chin, but I couldn’t find a green one in Lilly’s size. I didn’t want to make anything that ties under the chin because I didn’t want the strangulation hazard. So I went with a standard hood. As already noted, the head does sag to the side a bit with the hood. It may help to add elastic to the finished edge around the face, but I knew Lilly wouldn’t tolerate it. Maybe you have a better solution, but this is what I came up with…[See UPDATE at end of post.]
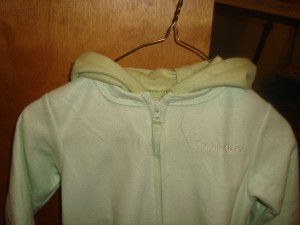
- I have never made a hood before and mostly found instructions for medieval-type hoods online. (Think Renaissance fairs — no, thanks.) So I just copied the basic design of the hood on Lilly’s winter coat.
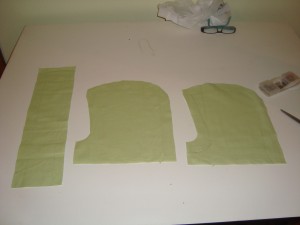
- Using flannel fabric, I made 3 pieces to create the hood: 2 side panels and a center stripe that connects them.
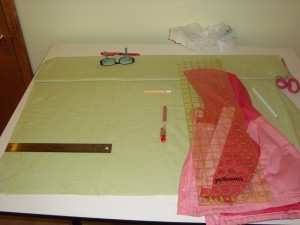
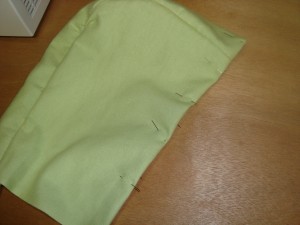
- To make the side panels, I took thorough measurements of the side panel from the existing coat hood, and tried to replicate it as closely as possible. I sketched the hood shape, leaving room for a 1″ seam allowance on all sides. The widest part of the side panel (before seam allowance) is 6-3/4″ and the base (where it meets the neckline) is 5-3/4″. It is approx. 9-1/2″ high (plus seam allowance). [All of those measurements refer to the main part of the hood, i.e. above the tab shape at the bottom of the side panel.]
I definitely recommend taking measurements from an existing hood that fits your child. The coat that I copied is size 12-18 mos., but still fits Lilly.** The tab I created for the front of the side panel (on the bottom left in this picture) turned out to be unnecessary, but having the extra fabric didn’t hurt. Always better to have too much than too little. **
- Pin two pieces of fabric together and cut out side panels leaving 1″ seam allowance on all sides.
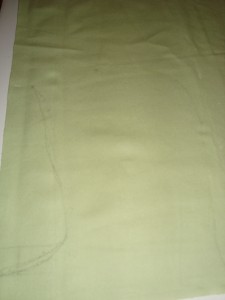
- Removing only a few pins at a time, so that the fabric stays lined up, slide the dressmaker’s tracing paper between the pieces of fabric and trace the drawn line for the side panel onto the bottom piece of fabric so that each panel has a visible line.
- Remove pins and set side panels aside.
- Using a ruler, draw a center piece that is 2-1/2″ wide. Then add a 1″ seam allowance on each side. Cut it from a single layer of fabric. I made mine long (approx. 19″), figuring I could always cut some off (and I did).
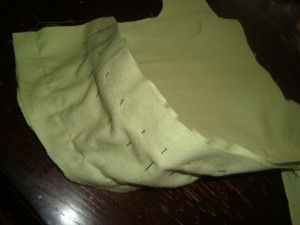
- Pin one side panel to the center piece, lining up edges and drawn lines on each piece. Machine-sew along the pinned line. Repeat.
- Trim excess seam allowance and turn right side out.
- Finish the front edge of the hood (around the face) by turning in edge, pinning and machine-sewing.
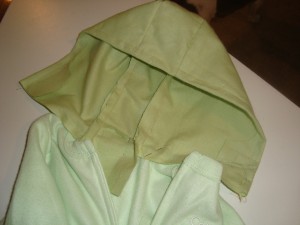
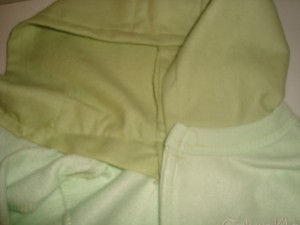
- Lay finished hood inside the neckline of the pajamas with hood fabric sitting at least as low as the bottom of the collar on the pajamas. Pin together, matching up the edge around the face with the edge of the zipper as much as possible.
- Machine-sew the hood onto the pajamas following the existing stitch line on the collar.
- Take pins out, trim any excess fabric and you have a hood!
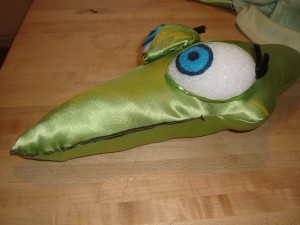
Attaching the Head to the Hood – Simple as glue.
- Have your child try on the costume with hood up and decide on placement of the head. It should sit so that the weight of the head pulls toward the face (to keep the hood up), but not so far forward that it obstructs your child’s vision.
- Gluing with a glue gun is most likely sufficient for a day of trick-or-treating. If you need extra security, or think your child will give it some extra abuse, you can add a few stitches through the hood after gluing. But either way, do make sure to use a LOT of glue.
The Final Touches (Face and Claws) – All of these steps are optional.
- Face: Using either permanent marker or fabric paint, add a mouth along seam line, two nostrils, pink cheeks and/or Tiny’s “freckles” on the bridge of his nose. BUT FIRST test your paints and/or markers on your fabric! After testing the paint on my fabric I wasn’t confident I could do all the facial features cleanly and opted for just a mouthline with permanent marker.
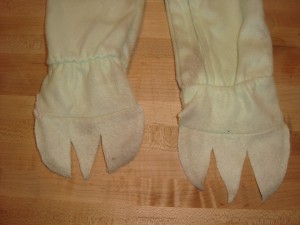
- Claws:
- Using scissors or a seam ripper, cut the bottoms out of the pajama feet so that your child can wear shoes with the costume.
- Make triangular cuts into the remaining fabric so that there are 3 “claws” resting on top of your child’s shoes.
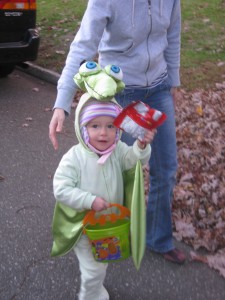
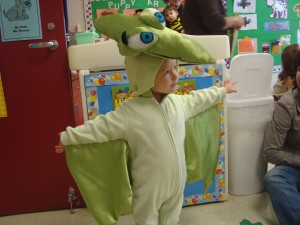
All done!
Please let me know if you have any questions or if I can clarify any of these steps. Otherwise, dress up your little “Tiny” and have a Happy Halloween!
UPDATE: Apparently, wearing a winter hat under the hood solved the drooping head problem!

The Project Pteranodon (Part 2/2) by MushBrain, unless otherwise expressly stated, is licensed under a Creative Commons Attribution-NonCommercial-NoDerivs 3.0 Unported License. Terms and conditions beyond the scope of this license may be available at mushbrain.net.
Great job! Lilly looks great in this!
This is adorable! I have been trying to come up with something like this since my son wants to be a Pteranadon too (he’s obsessed with Dinosaur Train!). I love the idea of doing the body as fleece pj’s – even if I can find any, I can wip some up pretty easily! Thanks!!!
Thank you, Mary Beth! So glad it helped with your brainstorming. I’d love to see pictures of your pteranodon when you finish!
My daughter wanted to be a pteranodon too. She loves dinosaur train. I did the wings on a hoodie with fabric and didn’t know how I was going to do the head til now. I love this, maybe I will have to make some adjustments since my little girl is five but, it is pretty spot on. She will be going in jeans so, I don’t know if I will do the feet or not, maybe if she likes the idea. Thank you. I guess being a pteranodon for halloween is more common than I thought.
I love the idea of using a hoodie – especially for an older child. Hope your daughter’s costume turned out great!