Project Pteranodon (Part 1/2)
Lilly decided a couple weeks ago that she wants to be “Tiny Pteranodon” for Halloween. Most people reading this are now thinking, “umm…who?” But for those parents like me with a child who LOVES PBS’s Dinosaur Train — recognizable by their ability to easily identify all varieties of dinosaurs and tell you whether or not they are fish-, leaf- or meat-eaters — this day was inevitable. If you are lucky enough to have a little Dinosaur Train fan who is 3 years old or older, there are Tiny and Buddy costumes available in some stores. But for those of us dressing up the younger set, there is no such luxury and the only way to go is homemade.
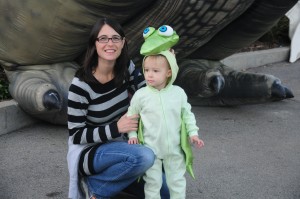
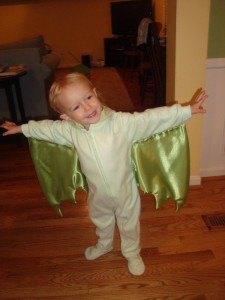
For the last week and a half, I have spent most of Lilly’s naptimes assembling her “Tiny” costume and now [drumroll . . .] it’s done! Yay! I’m not as bad a mother as I feared! Here is the final product:
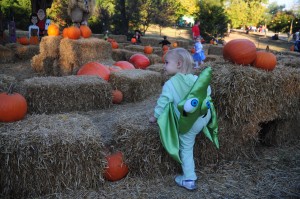
I think it came out pretty darn good, if I do say so myself. There is a bit of a balance problem with the head [see UPDATE in Part 2], so most of the time Lilly wore it, it looked like this:
But overall I’m happy with it and so is Lilly, which is all that really matters. That, and I managed to get at least one picture where it looks good. (Ignore my hand behind her holding Tiny’s head in place.)
I scoured the internet for days looking for a toddler Tiny costume and/or helpful sewing patterns for a pteranodon and I found pretty much zip. [If you have a “Buddy” fan, you can use these patterns on the PBS website.] So I thought I’d write a how-to in case anyone else is faced with the task of creating a pteranodon without a pattern. I have only mediocre sewing skills, so this is something almost anyone with a sewing machine (or the time and patience for a lot of hand-sewing) should be able to do. And I think the same methods could easily translate to many other animal costumes. Be warned, however, that I am not “trained” in sewing and tend to just wing it. [Ha! No pun intended!]
Be sure to look for the **starred instructions** so you can learn from my mistakes!
Materials and Supplies (for approx. size of 2T):
- 1 pair green footy pajamas
- 1-3/4 yards shiny, green fabric for wings and head (I used a polyester that looked satin-ish.)
- 1/2 yard softer, sturdier, green fabric for hood (I used flannel.)
- matching thread
- 1 large piece of drawing or tracing paper
- 1 styrofoam egg (2-7/8″ x 3-13/16″)
- 1 piece blue felt
- 2 black chenille pipe cleaners
- pillow stuffing of any sort (batting, tissue paper, newspaper, etc.)
- “Tiny” picture, for reference
- glue gun
- basic sewing supplies including dressmaker’s tracing paper and tracing wheel
Cost & Time: I got my fabric 50% off at Joann’s and found the perfect pajamas for $6 at T.J. Maxx. The rest of the supplies I either had or bought at craft stores for a couple bucks. Total cost was approx. $15-20. Total time was approx. 7-8 hours, including the time it took to correct my mistakes.
The Wings – The basic idea here is to make 2 unstuffed, wing-shaped pillows and sew them onto the pajamas.
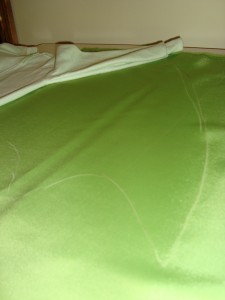
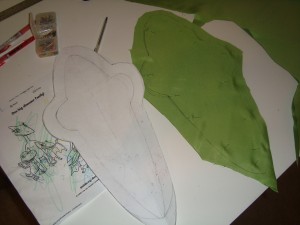
- Lay out shiny fabric right sides together. Lay pajamas along edge with sleeve extended upward and sketch in the shape of the wing.
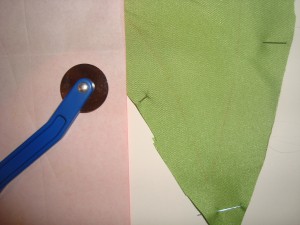
**This picture is of my second set of wings. I had to redo this step because the first time I only held the arm out to a right angle, which didn’t give the arm a full range of motion. Be sure to extend the sleeve above the shoulder when sketching the wing.**
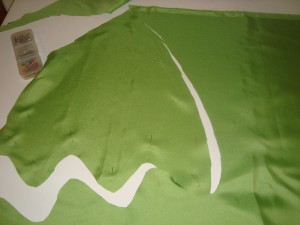
- Pin fabric together and cut out wing leaving a seam allowance on all sides.
- Using dressmaker’s tracing paper and tracing wheel, trace the sketched wing shape onto another area of fabric folded with right sides together. Pin new fabric and cut out leaving seam allowance. Now you should have two identical sets of fabric in the wing shape, each with a visible line along which to sew.
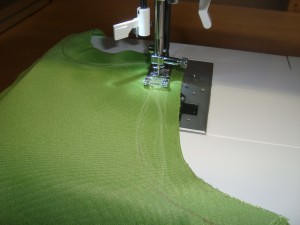
- Machine-sew along sketched/traced line leaving a 2-3″ opening on each set of wings as if making a pillow.
- Trim excess fabric from seam allowance and turn wings right side out through opening. Use a pointy object like a pen cap or knitting needle to push out points along the bottom of the wing.
- Close opening on each wing with hand- or machine-sewing.
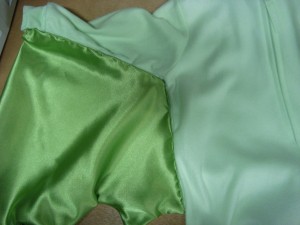
- Pin wings in position along the body and sleeves of pajamas. Use a blind stitch to attach the wings to the pajamas. (I like this short video as a refresher on doing a blind stitch. You can find many others if you need a more thorough tutorial.) I know this sounds like a horribly tedious process, but it actually went very quickly. I had both wings on in less than 45 min.
- Now your little Tiny has wings!
The Head – Again, think pillow. That’s all this really is.
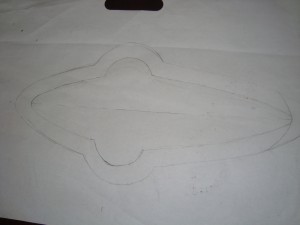
- Draw the basic shape of a pteranodon head on paper. (To get it symmetrical you can draw one side, fold in half and trace the other half.)
You can see I adjusted the size several times, but ultimately the outer shape is the one I used – length: 18″; width (at widest): 8-3/4″.
- Cut the shape out of paper and trace onto shiny fabric, folded right sides together. Pin fabric together and cut out.
- Sew together like a pillow, leaving approx. 2-3″ opening towards the back of the head.
- Turn head right side out, stuff and close gap with hand- or machine-sewing. **I used batting from an old pillow, but tissue paper might have worked better, in retrospect, since the weight of the head made balancing it difficult.**
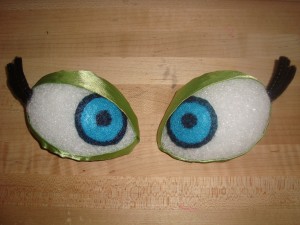
The Eyes – If you want to take a shortcut you can probably just paint on eyes or use white felt in place of the styrofoam, but I think doing it this way really made the costume recognizable as “Tiny.”
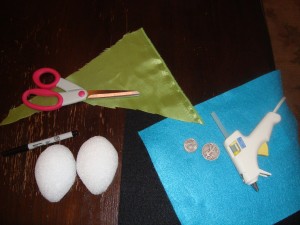
- Cut the styrofoam egg in half. These are your 2 eyes. The narrower side goes toward the bridge of the nose.
- Make 2 circles with 1-1/2″ diameter on the blue felt and cut out. I traced a silver dollar to get a nice circle.
- Using a black permanent marker make a thick border and pupil on each eye.
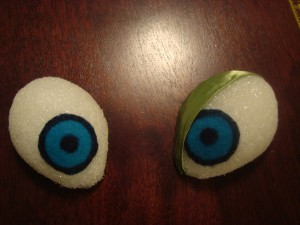
- Attach blue felt to styrofoam eyeballs using glue gun.
- Also with glue gun, make upper and lower eyelids using scraps of shiny fabric.
- Cut chenille pipe cleaners into 6 pieces of 1-3/4″ length.
- Bend into slightly curved “eyelashes” and push 3 pieces in a row into styrofoam at outer edge of upper eyelid. Secure with glue gun.
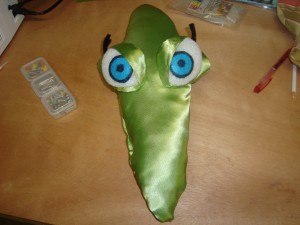
- Attach eyes to head with glue gun.
You’re almost there! I’ll post the last few steps, i.e. attaching the head and making a cute little tail, tomorrow.

The Project Pteranodon (Part 1/2) by MushBrain, unless otherwise expressly stated, is licensed under a Creative Commons Attribution-NonCommercial-NoDerivs 3.0 Unported License. Terms and conditions beyond the scope of this license may be available at mushbrain.net.
Thanks for the instructions. My daughter loves Dinosaur Train and pteranadons and dinosaurs in general and I plan on making her one for her birthday.
You’re very welcome! Good luck with your daughter’s costume!
You are the best ever!! My daughter is in love with all things dinosaurs, especially Dinosaur Train. I have a feeling a pteranodon costume request is on its way. 🙂 Thanks!
Well, thank you! Glad you found it useful!
Hi there!
Thank you so much for posting this!
My daughter had a dinosaur project and she chose to research Pteranodons.
When she asked me to make a costume to go with the project I was stuck for ideas…until I found this gem of a post! You’re a lifesaver!
Thank you so much for this tutorial!
My two sons dreamt of being pteranodons on carnival. Thanks to your blog, I made their dream come true! I agree with Yu Ling, you’re a lifesaver!
Thank you! I am so glad I could help in some little way! I hope your boys love their pteranodons!!
Thank you, Yu Ling! Yes, I know that feeling…”You want me to make a what? A Pteranodon??” LOL Glad the post helped!
OMG. Thank you. I have to make both Shiny and Tiny for Halloween this year and I had no idea where to start. You rock!